Let’s play a game of who said it? “People who love to eat are always the best people.” If you said Julia Child, then you would be correct. But also if you said me then you would also be correct. I do like to eat…and to cook. I want to learn as many modalities of cooking as I can without going broke doing it.
When I initially purchased a pellet smoker I felt like it wasn’t a “real” smoker since it didn’t involve cuts of wood that I procured myself. I’m sure there are some purists out there that still feel that way, but I’ve pumped the brakes on self judgement and gone practical. Pellet smokers do use wood and their technology is on point for those of us non-lumberjacks who just want to learn to smoke all the things.
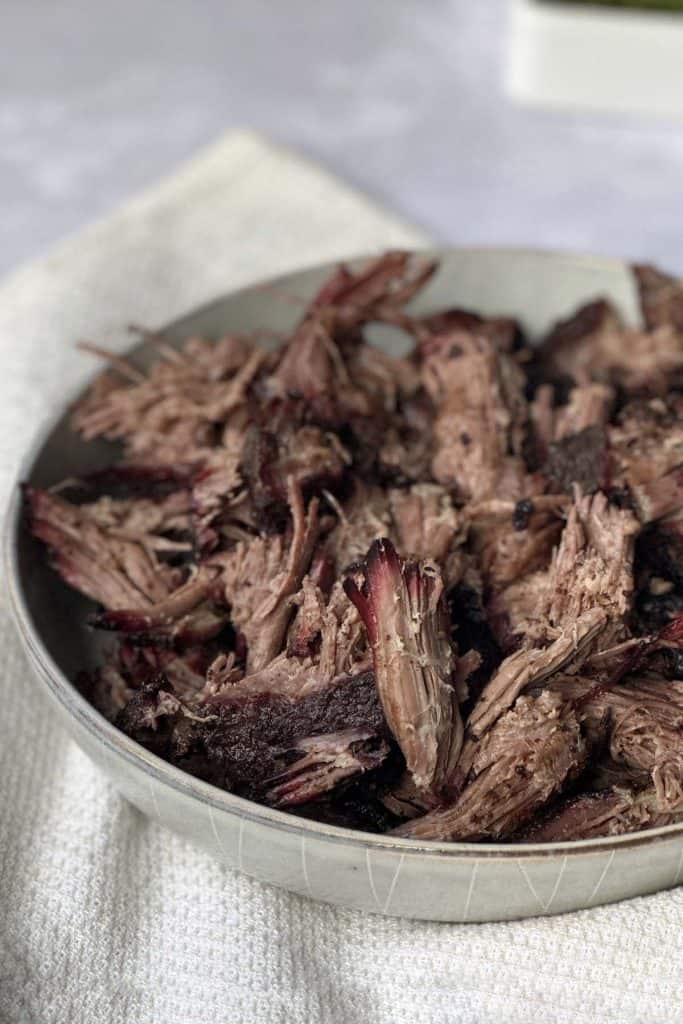
Get out of your chuck roast rut. You won’t be sorry!
I’ll admit that sometimes I find myself getting into a rut with a cut of meat. This was definitely the case with a chuck roast. Honestly, I didn’t even change up the flavor profile very much. Classic beef roast and beef stew were about the extent of my chuck roast repertoire. Embarrassing but it’s out there now.
While I know that you can smoke darn near anything that’s not nailed down, I also don’t think outside the box sometimes. Other times my creativity is sparked and I just start throwing things together and get new ideas. I thought I was clever when I had the idea to smoke a chuck roast but I wasn’t. Fortunately, that also shortened the learning curve for me. I whipped out chef google and found a simple and straightforward method of smoking this affordable cut of beef. I practiced a few methods, and developed a process that I think works best.
How does it compare to brisket?
If you fancy beef anything then you know that brisket rules the roost when it comes to the creme de’ la creme of BBQ. I gotta tell ya, though, that this rivals brisket when you are weighing both cost and taste. In our house we have coined the phrase “chisket”. As you might has guessed it’s a combo of the words chuck and brisket. It’s really quite impressive and worth the time investment.
Smoking several roasts at a time saves you meal prep time in the future and makes efficient use of the resources needed to make this mouth watering cut of protein.
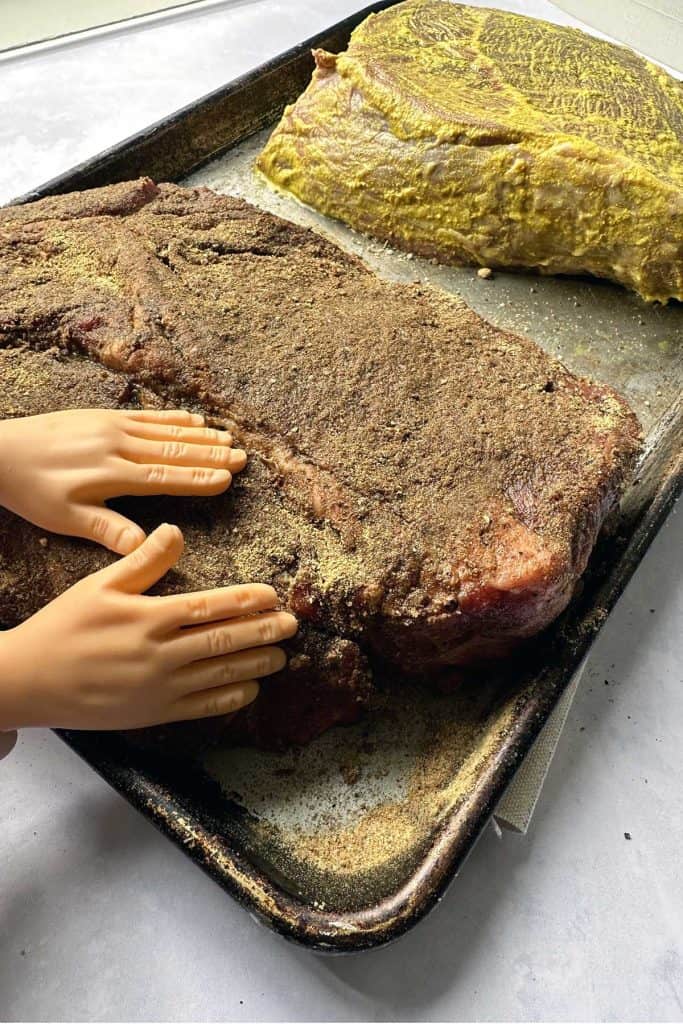
Does that big streak of connective tissue that runs across the middle of this primal cut turn you off or scare you? I’ve purchased cuts of meat before that once I was done cooking and slicing/pulling the meat, I had a big pile of fat and connective tissue leftover. It frustrated me to sort out and it felt like a waste of money. I want to encourage you to push past these feelings and give it a try.
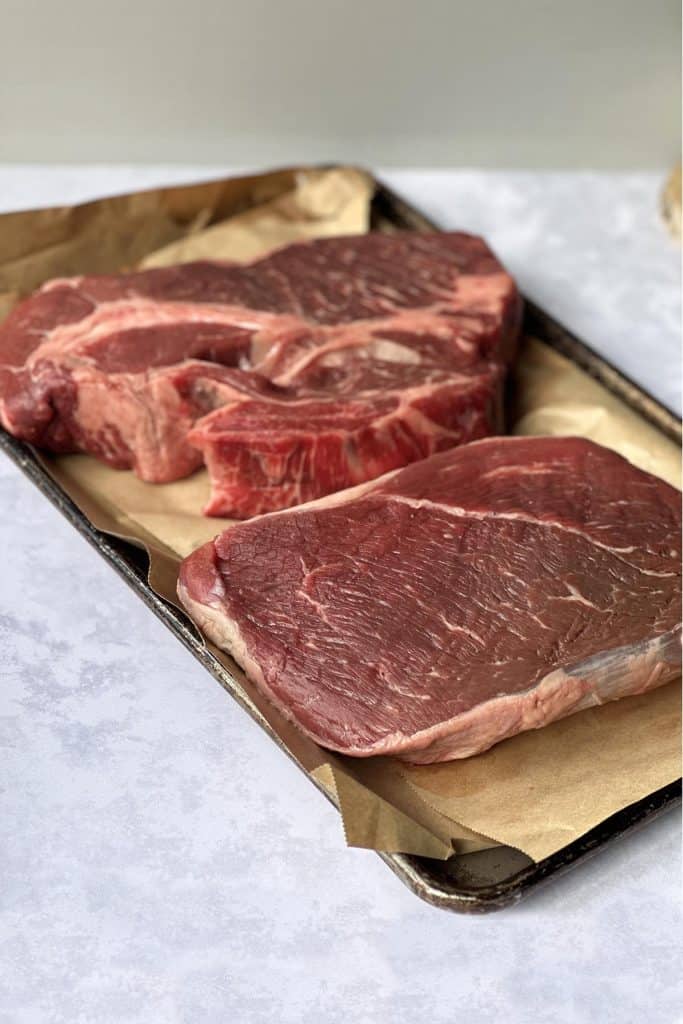
The image above is an example of two different possibilities for how your chuck roast might look. The one on the top looks like it would only offer a small return of cooked meat and that the connective tissue and fat would be messy to sort out. The one of the bottom visually looks more appealing to most folks. Truth is, the connective tissue breaks down, which makes the meat and tissue easy to sort. The fat adds flavor and moisture.
What equipment do I need?
- Pink Butcher paper – This is my preferred medium. I got mine on Amazon. A roll will last you a long time.
- Bakers twine – Sometimes your roast needs a hug to stay together.
- Thermometer – Instant read or probe. You just need to keep an eye on the temp.
- A pellet smoker – I have a Grilla chimp and I’ve used Traeger in the past. Whatever smoker you love, load it up with pellets and let’s get smokin’!
Pellet smoked chuck roast ingredients:
- Chuck roast (at least one 3-4 pound cut), preferably grass fed.
- Binder – Something to adhere your spices to the surface of your meat. I’ve used mustard, coconut aminos or worcestershire sauce.
- Seasonings – Chef’s choice here really. Garlic and onion powder, sea salt, pepper, and thyme are all good. I can’t tolerate nightshades but if you like it spicy, cumin and cayenne would be great additions to this as well.
- Broth – Homemade, store bought, beef, chicken, vegetable…you pick.
- Apple Cider Vinegar – Use this to spritz your roast. You could also experiment with other vinegars to change up the flavor profile. I’ve made this with coconut aminos and asian five spice and it is stellar!
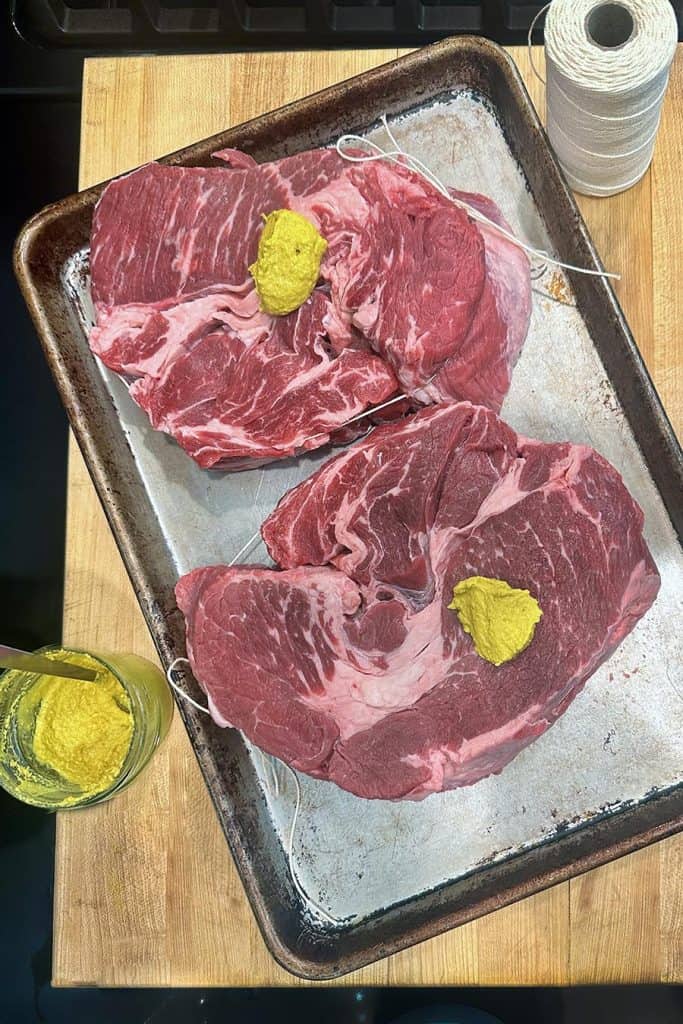
Preparing your chuck roast for the smoker.
- Rinse your roast, pat dry with paper towels.
- Bind horizontally with bakers twine, if necessary.
- Use a binder to adhere the spices to your cut of meat.
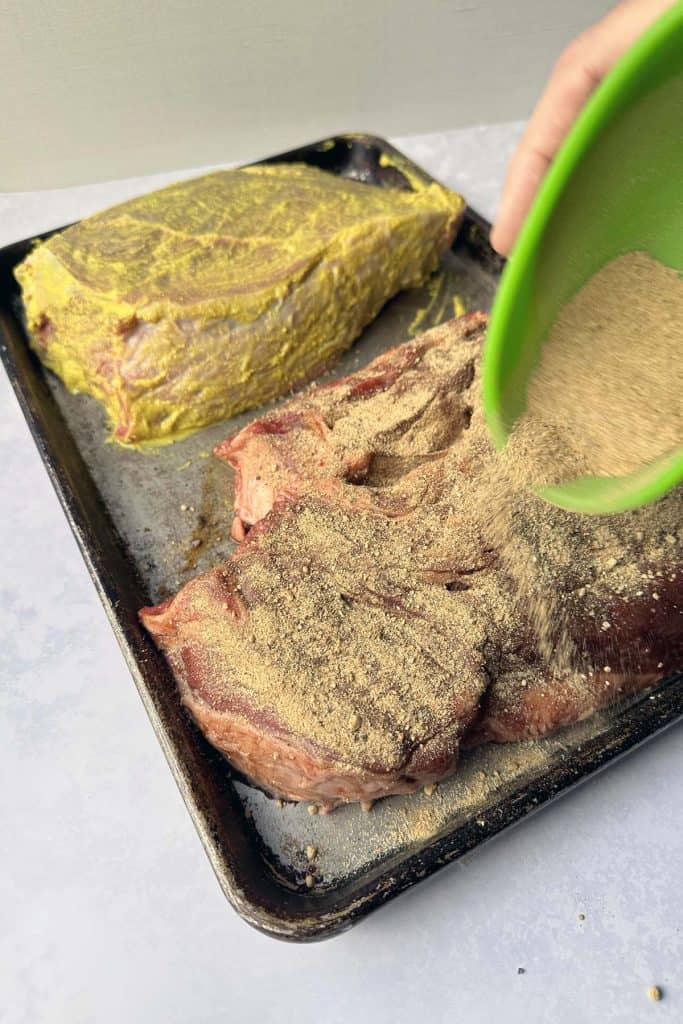
- Liberally coat your roast with seasoning. I use a variation of a house blend from The Healing Kitchen (by Alaena Haber & Sarah Ballantyne). It’s 1 teaspoon each of oregano, thyme, garlic powder, onion powder, ginger powder and 1/2 teaspoon tumeric. I double or triple the ginger because I like ginger and I want a little spice.
- Don’t go easy on a good quality salt. I add at least a tablespoon of either sea salt or celtic gray. Press it into your meat to assist it in hanging around for the smoke. I don’t recommend table salt, which is highly refined.
Does smoked chuck roast freeze well?
Absolutely! Portion into sizes that work for your family in a freezer style ziplock bags or your beloved vacuum sealer bags. Thaw overnight in the fridge to flash fry in a pan. Or you can remove it from the plastic and let it wade in a pool of delicious broth and heat it up in the oven, covered, at 350*F until it’s warm, usually about 15-20 minutes depending on portion size.
I like to smoke at least 2 roasts at a time since it does take quite a few hours to make. This meat reheats well so you can batch cook a gaggle (what DO we call a group of roasts?) for a quick meal down the road. Who doesn’t love a cook once eat twice kinda meal?
This is meal prep bliss!
Since I encourage my readers to prep at least 2 roasts at a time, I would say this is a great meal prep food. You can choose to slice or pull the beef which means it’s great for future sandwiches, one pot meals, additions to a quiche or as a topper for baked potato night! Divide into portions appropriate for your family size and wham, all ready to go for the next time you need a heat and eat kinda meal.
Print
Pellet Smoked Chuck Roast
- Prep Time: 15 min
- Cook Time: at least 4-5 hours
- Total Time: 0 hours
- Category: BBQ
- Method: Smoking
- Cuisine: American
- Diet: Gluten Free
Description
If you fancy beef anything then you know that brisket rules the roost when it comes to the creme de’ la creme of BBQ. I gotta tell ya, though, that this rivals brisket when you are weighing both cost and taste. It’s important that you cook this cut of meat low and slow otherwise it will get tough and dry out. Resting your meat is also a must in order keep all the moisture from escaping.
Ingredients
- Chuck roast (at least one 3-4 pound cut)
- 2–4 Tablespoons yellow mustard, (per roast) depending on the size of the roast
- 3 Tablespoons of seasoning – Use a combination of garlic and onion powder, sea salt, pepper, and thyme, if you don’t have a favorite.
- 1/3 cup beef broth (but any flavor will work)
- 1/2 cup apple cider vinegar
- 1 cup unsweetened apple juice (optional)
Instructions
- Pull your chuck roast(s) out of the fridge and let them sit at room temperature for about 30-40 minutes. During this time, give them a rinse off and pat them dry with paper towels.
- Bind the roast horizontally, if necessarily so the meat stays hydrated and it’s easier to turn.
- Apply half the binder to each side of the roast making sure you cover the entire surface area.
- Follow up by covering the roast liberally with your choice of seasoning.
- Assuming it took you about 20ish minutes to prep your roast, you can fire up your pellet smoker to 250*F.
- After your smoker has come to temp, place your roast(s) directly on the grate, close the lid and cook for 2 hours.
- Meanwhile, mix the water and apple cider vinegar in a clean spray bottle.
- After about 2 hours, the roast will begin to form a bark on the outside and look a little dry. Spray it down liberally with the apple cider/water combo. *
- You’ll continue to smoke the roast until it reaches an internal temp of 165*F, spraying it down every 30 minutes until it reaches temp. Flip it over every time you spray it. * This helps maintain even moisture.
- Once it reaches 165*F you can remove the roast and wrap it in pink butcher paper *(see notes) OR you can leave your meat on the smoker and continue to spray it down every 30 minutes or so. If you leave it on your smoker, skip to step 13.
- If you choose to wrap your roast, heat up your stock till it’s warm. Cold stock will cool down the roast too much and boiling stock will par cook it. You want it close to the temp of your roast.
- Add your stock to your roast, wrap it and place it on a baking sheet before you put it back on your smoker. If you use the temp probe of your smoker, insert thermometer by puncturing through the paper on the top.
- Continue smoking until the temp of your roast reaches 205 degrees F then remove the roast/pan from the smoker.
- If you haven’t wrapped your roast yet go ahead and wrap it. Place it on a tray and wrap the tray in an old towel and place it in a cooler.
- Let your meat rest at least an hour before cutting or shredding it. I’ve even let it in a cooler for up to a few hours and as long as the cooler is full (fill in empty space in your cooler with more towels). It will maintain its warmth. Resting your meat is highly necessary to keep the moisture in the meat.
Notes
*If you run out of the water/ACV combo, you can mix up another batch and continue to use that or sweeten things up a bit with apple juice. Don’t skip using the water/ACV combo though, as it tenderizes the meat. I use organic unsweetened since apples are sweet all on their own. Organic not only means no glyphosate but it also tastes much better.
This content is for informational purposes only. We are not responsible for any errors. We have tested the recipe for accuracy, but your results may vary. Please note that this is not medical or nutrition advice. Seek advice from a licensed professional if you need advice. We are not liable for any damages caused by your use of this content.


Leave a Reply